Last episode, Aubzhang came clean: if ordinary people want to do something with AI, the first job isn't rushing off to learn code. It's mental preparation.
Plenty of friends read it and came right back: "Mindset's set. So what tool do I use?"
Aubzhang's answer is blunt: skip the flashy stuff. If you're new, go straight to WorkBuddy from Tencent.
When Aubzhang built his first app, he couldn't even tell you which part was front end and which was back end. But with WorkBuddy, he dragged it from an idea into software he could actually tap open on his phone.
Today, plain language, hand-holding. Aubzhang walks you through the tool that lets an ordinary person "grow a few extra arms." No binging here. One thing only: get familiar with the basic interface of the strongest AI tool on the table, and get an MVP (minimum viable product) running.
1. Kill One Illusion First: A Product Doesn't Have to Be an App
Beginners hear "build a product" and immediately think: "I can't code, so I can't."
A dozen years as a product manager, Aubzhang has to correct this: an app written in code is only one kind of product. A tightly reasoned research report, a deck you can carry straight into a review, even a cleanly organized Excel sheet — if it solves a concrete problem, it's a good product.
And WorkBuddy is the external brain that produces exactly these "products."
Open WorkBuddy and the first impression might be: kind of empty. Don't panic. Take the screenshots below and let's take the interface apart.
2. The Left and the Right
Look at what Aubzhang captured. The WorkBuddy interface is extremely clean. Two main blocks, left and right.
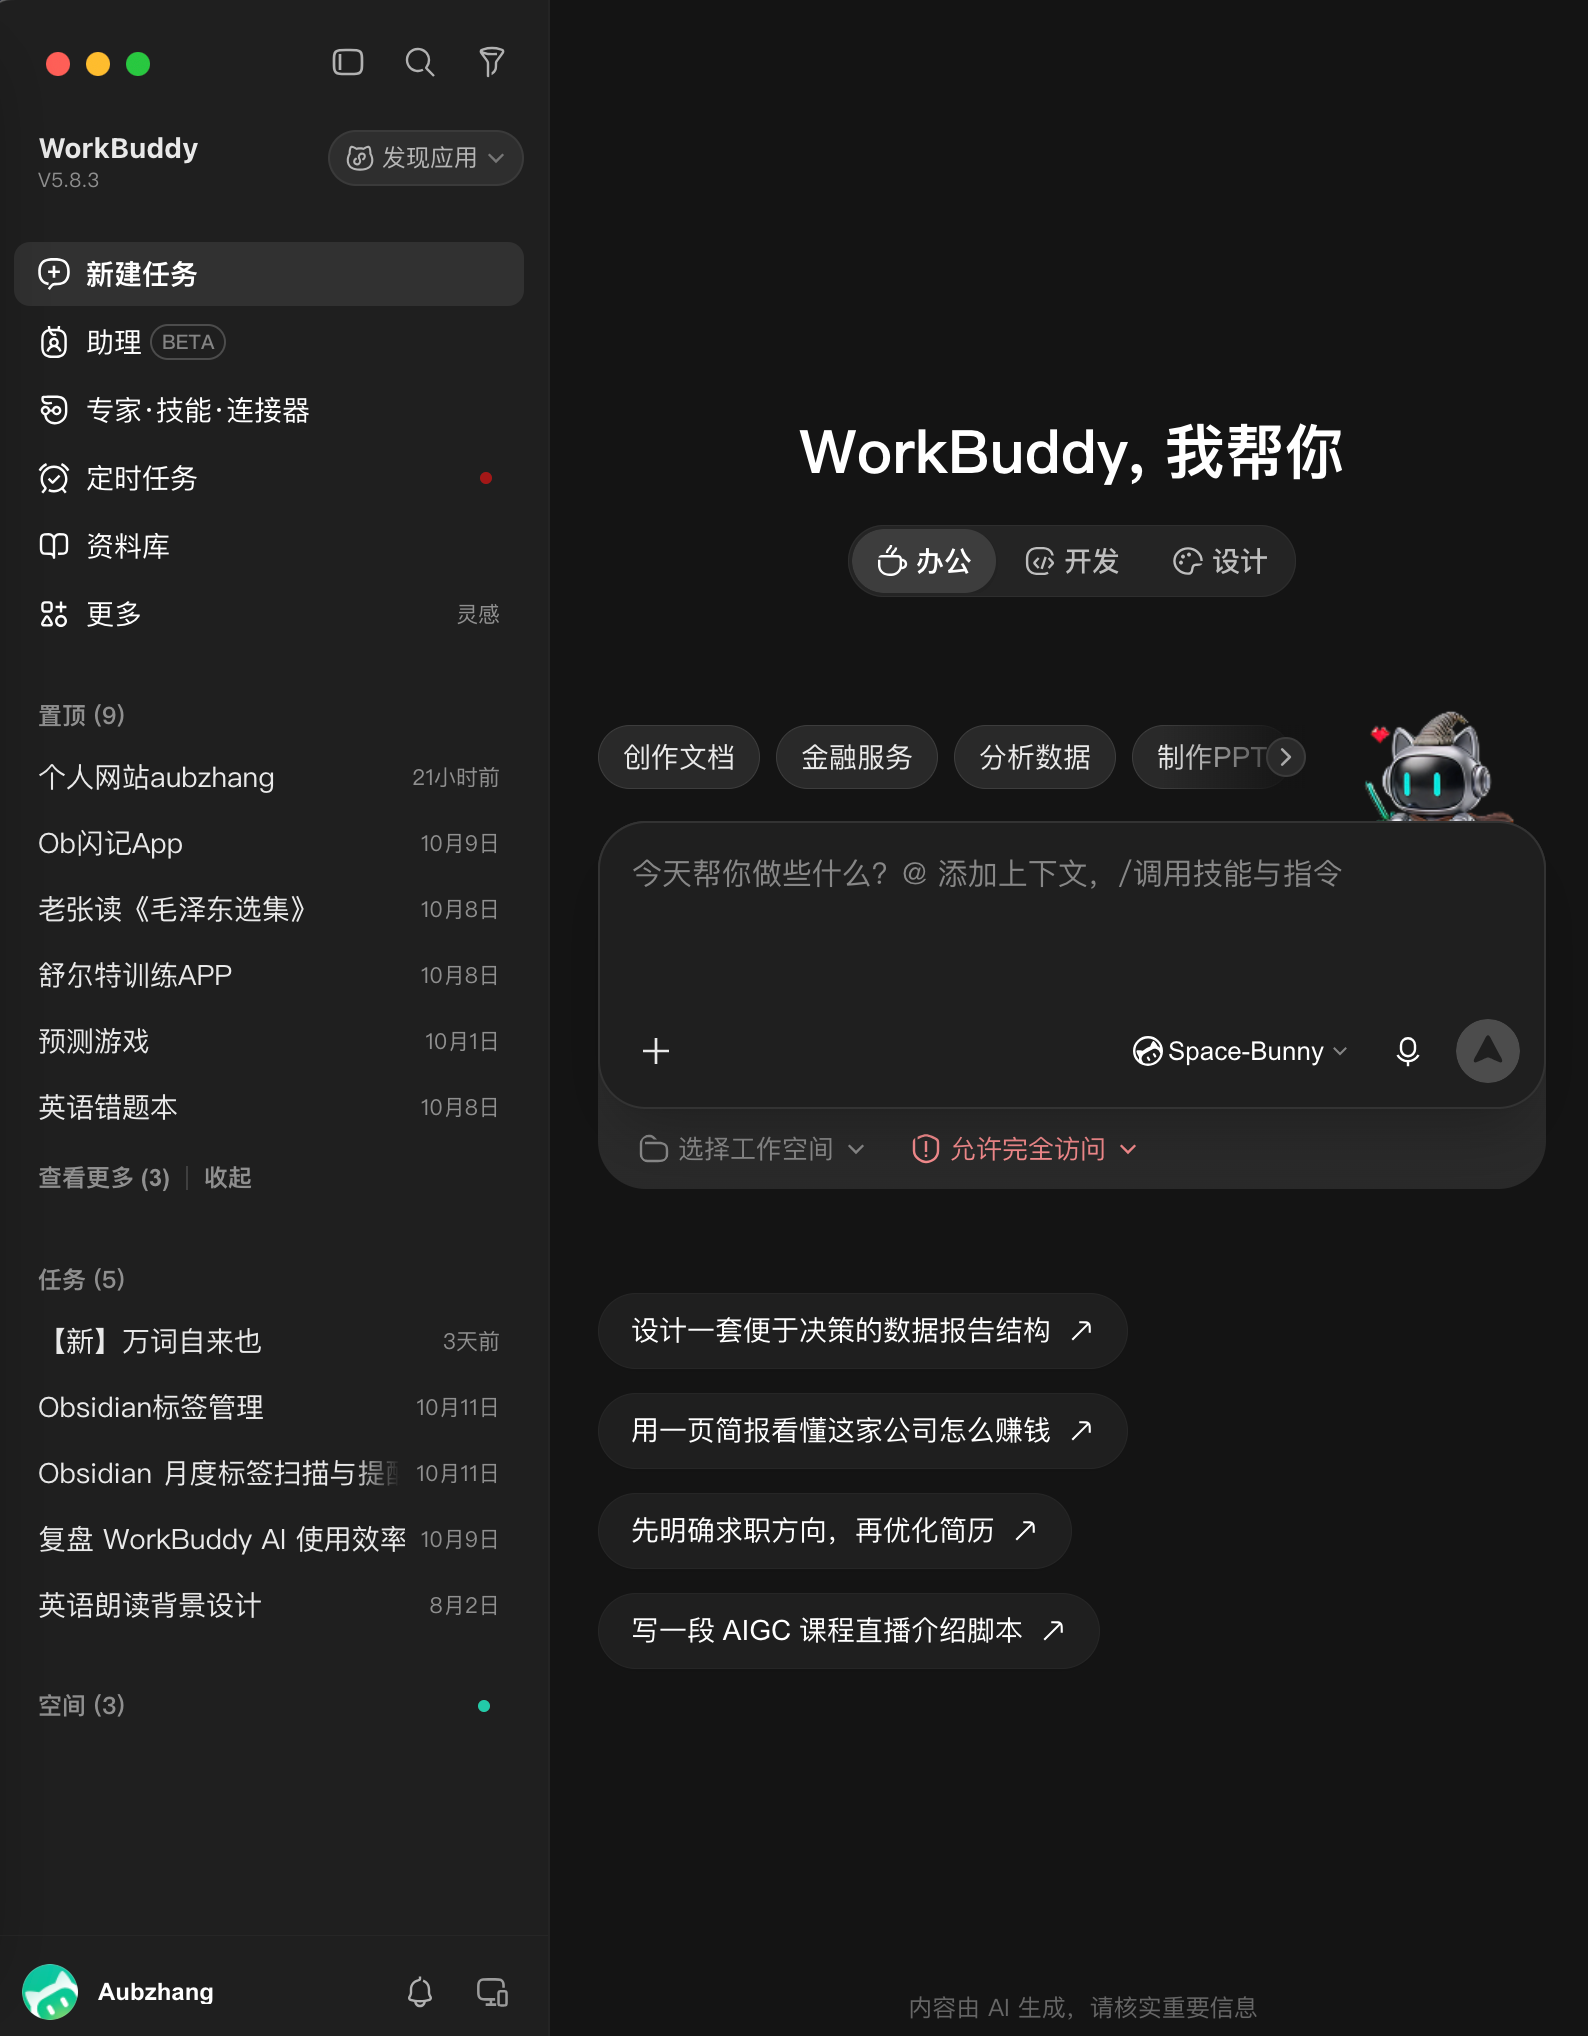
1. Left sidebar: your base camp
- Top left is the basic toolbar. Plenty of functions in there, but today you only need one button, the top one: "New Task." The rest, unlock later, slowly.
- Bottom left is your list of past tasks. Every project you've ever worked on sits here in a row, so you can pull it back up and keep editing anytime.
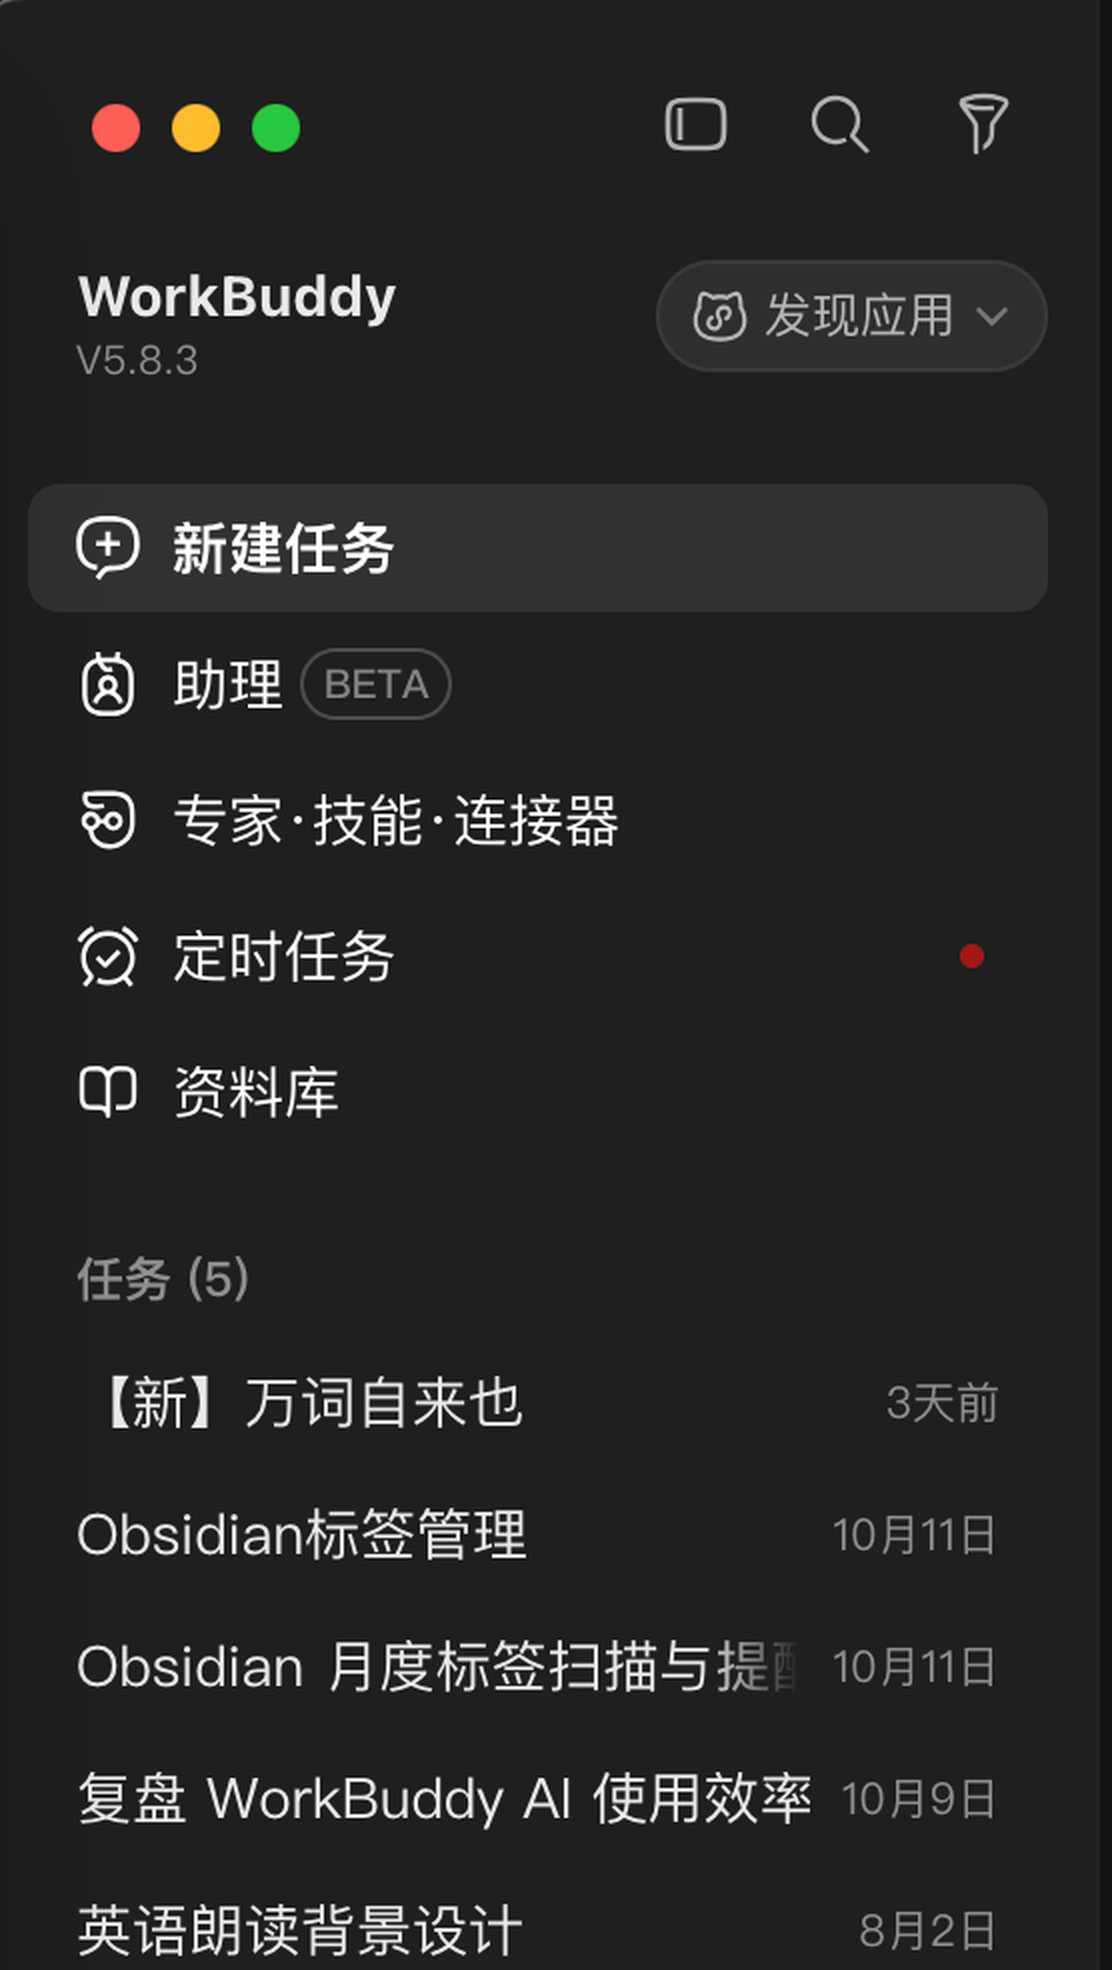
2. Right side: your main workbench
Note this: only after you click "New Task" on the left does the input panel show up on the right.
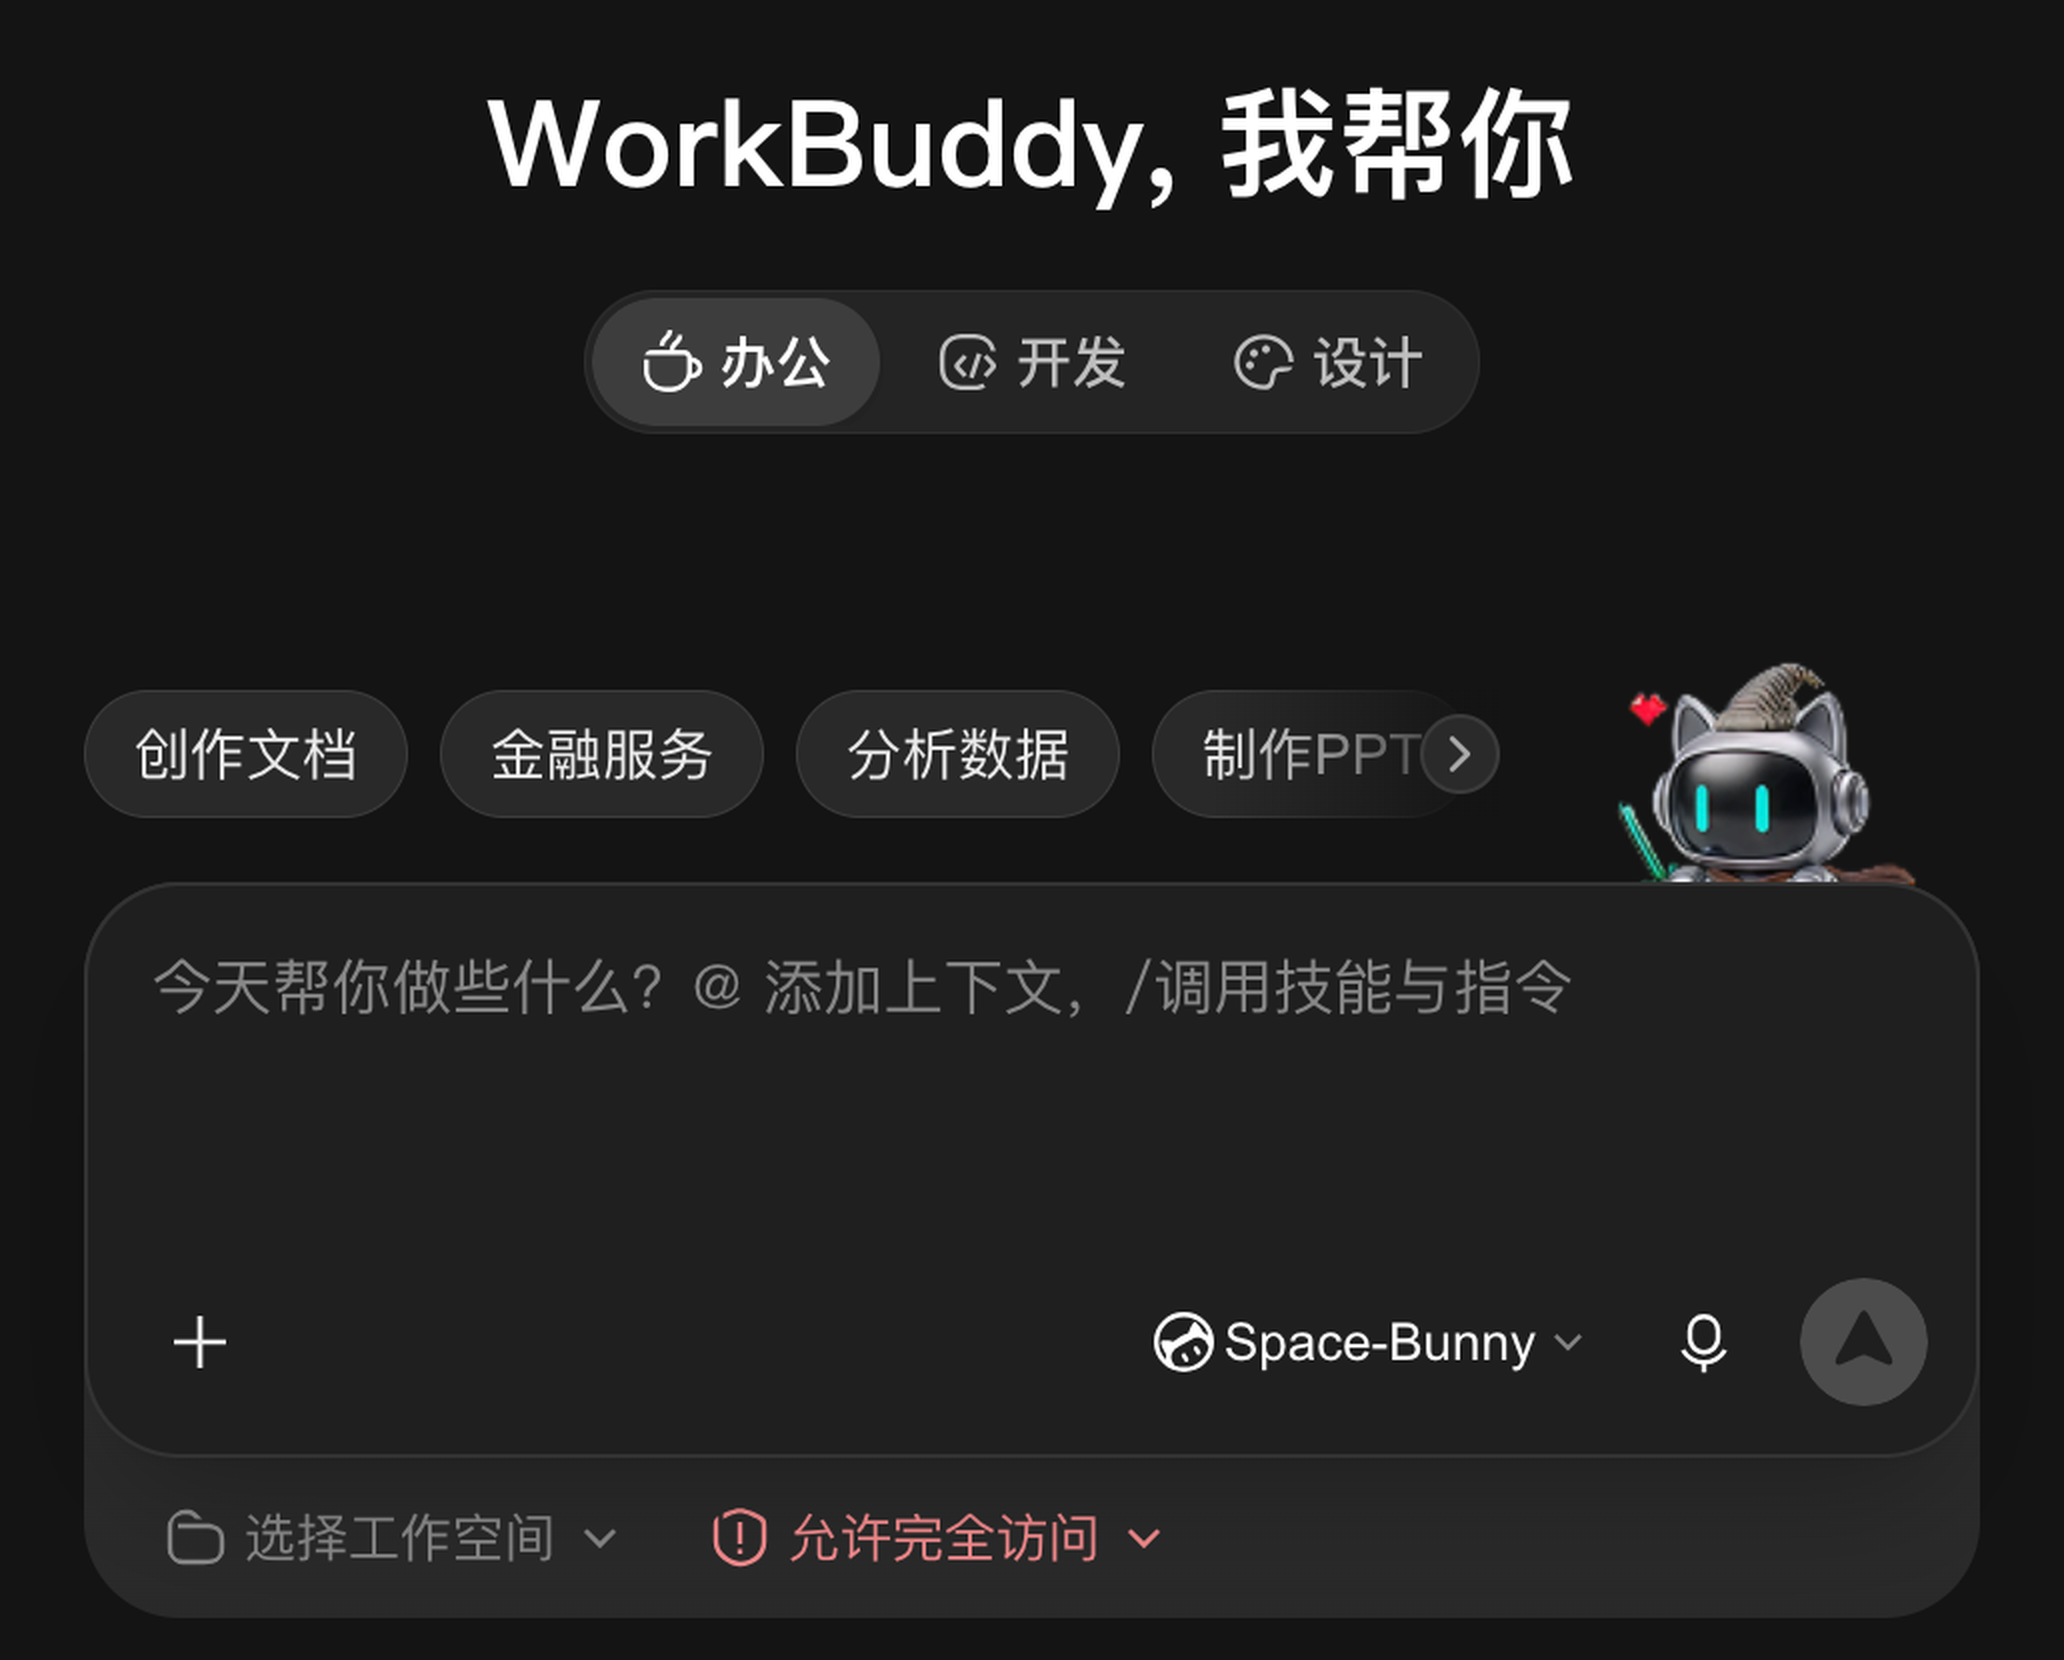
That's where you hand work to AI. Above the big input box there's a row of suggested scenarios: Create Document, Analyze Data, Make a PPT and so on. If a beginner has no idea what to do, click one of those and it pops up the matching template.
But Aubzhang would rather you just type into the box. More freedom.
One piece of beginner advice Aubzhang considers critical:
At the start, ignore all those fancy "skills" and so-called "Skill" plugins. Just describe your real need in plain language in the task box and hit send. AI picks things up faster than you think. Learning to talk to it in natural language beats learning any complicated operation.
3. Beginner Must-Read: Models and Credits
See the small button at the bottom right of the input box, showing a name like Space-Bunny? Open it and you get a long list. That's the model selector.
This is also where beginners fall into the pit most often. Don't click blindly. It affects both the result and your wallet.
1. What does the "multiplier" after each model mean?
Every model has a number after it — 0.08x, 0.29x, even 1.20x. That's how fast it burns credits when you use it.
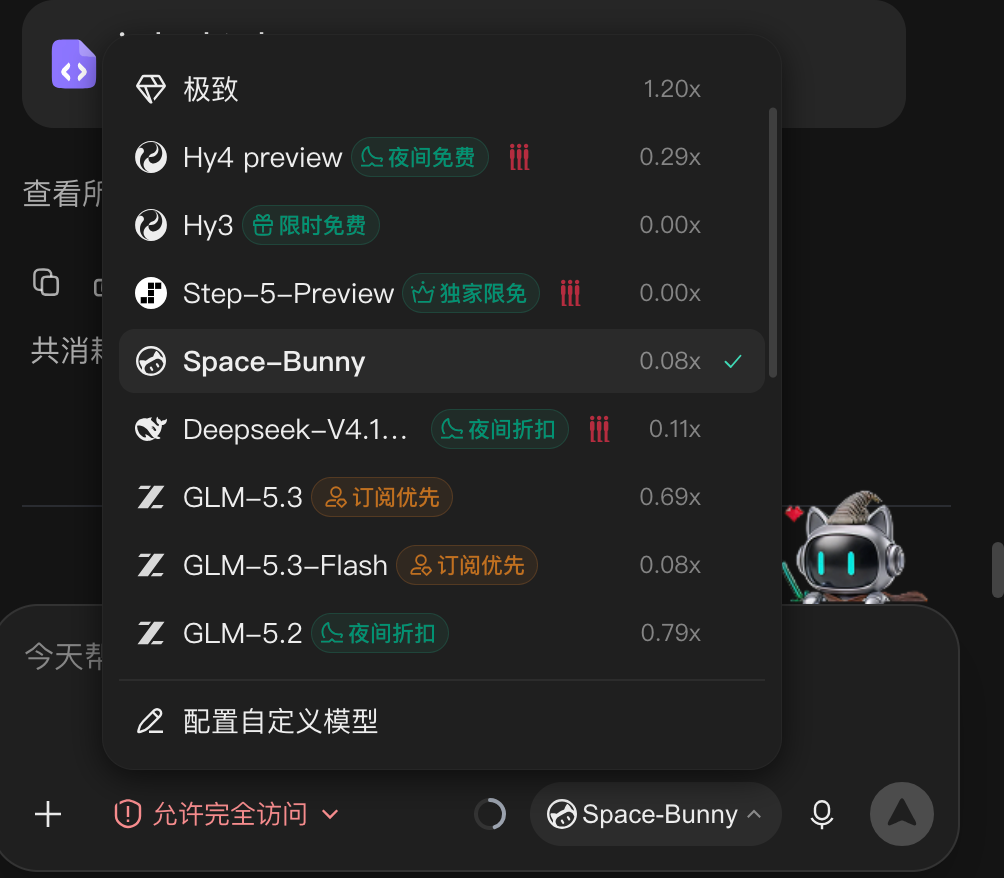
- 1.20x (top tier): most expensive, smartest. Built for brutally complex code and deep reasoning. Don't use a cleaver to kill a chicken.
- 0.08x (like Space-Bunny, GLM-5.3-Flash): cheapest, fastest. Good for chatting, simple copy, polishing sentences.
- 0.00x: you'll see green
0.00xentries in the list (like Hy3, free for a limited time). Grab that freebie. Aubzhang used free models constantly while building Wanci Zilaiye.
2. The brutal truth about the credit system
AI compute costs money. WorkBuddy runs on credits.
- Daily check-in earns free credits.
- At the start of every month, you get 500 base credits. For light users, that's basically free.
- WARNING from Aubzhang: credits reset at the end of each month. Gifted credits do not roll over. So use them early in the month. Hoard them and the system keeps the leftovers.

Aubzhang's pit-avoidance rule: as a beginner, never reach for the 1.20x top model first. Run the whole flow on a free or ultra-low-multiplier model. When it genuinely can't finish the job, then switch up.
4. Assigning Work: How to Ask So It Lands
Rules understood, hands on. Beginners, do not ask AI to build a web page on day one. That leap is too big.
Remember the "foreman" idea from last episode? In the chat box, you need to nail three things: who you are, what you want, what the requirements are.
Say you want a short-video script. Type this:
"You are a senior short-video director. Write me a one-minute Douyin script on the theme 'why middle-aged people need exercise.' The opening has to hook. The middle needs three concrete takeaways. The ending should push for likes."
Hit enter, wait three to five seconds, and a clean script appears on screen. That's the first "product" you finished in this tool at the lowest possible barrier.
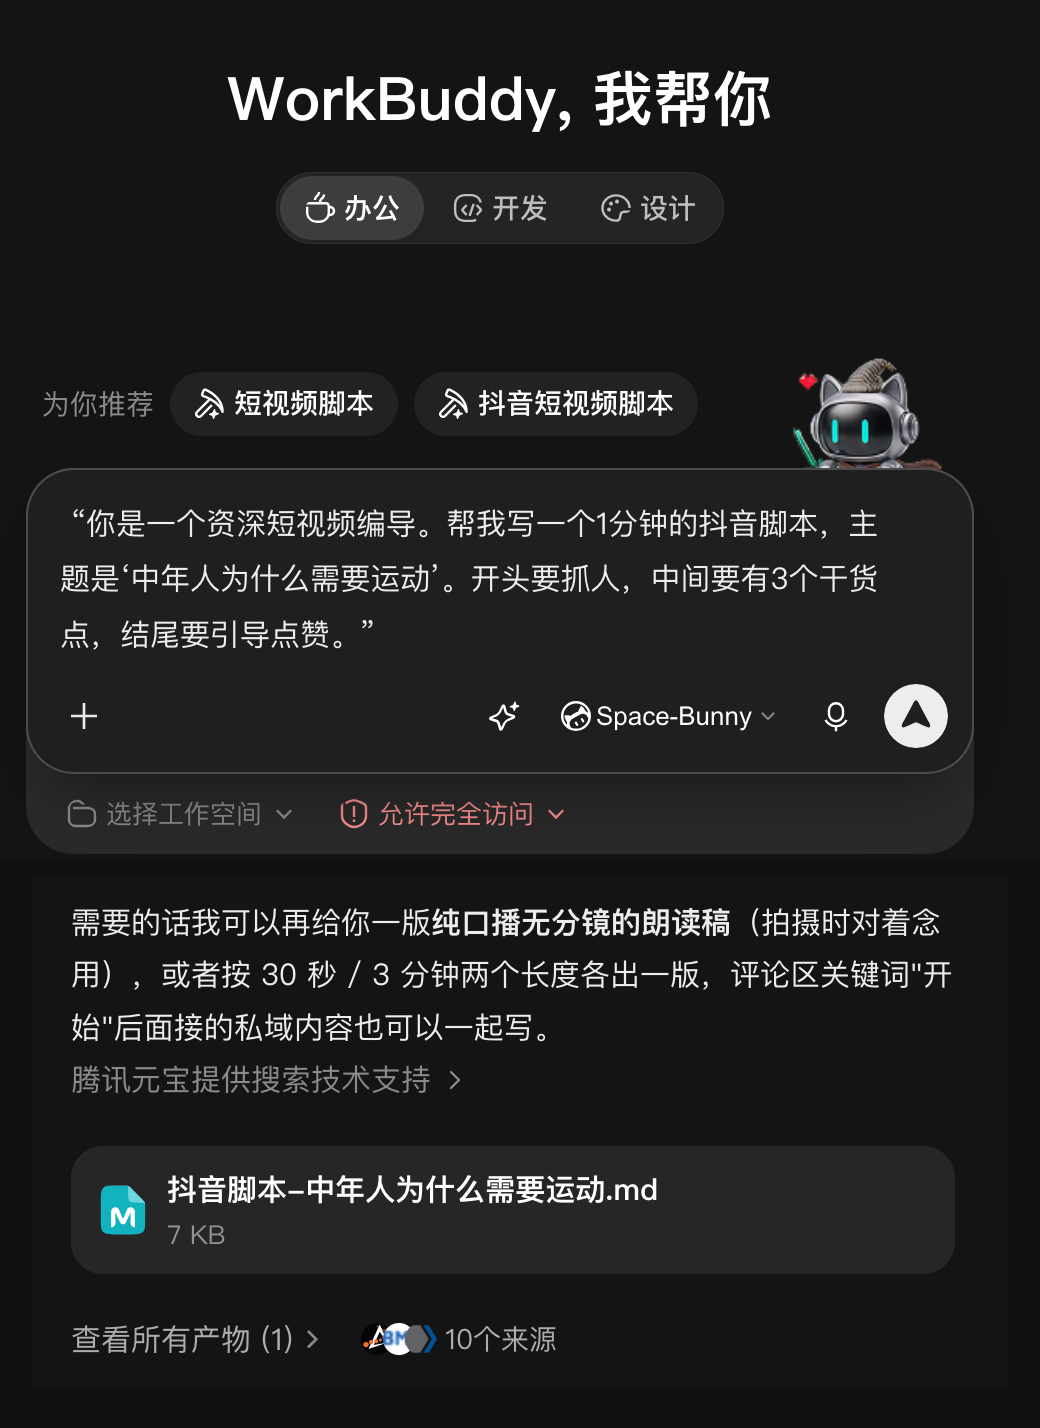
If you need to export it, or build something more complex (say, a simple web page), it generates a preview panel right beside the chat. Not happy? Tell it to change. Never fear an error. Copy the error text back to it and let it fix itself.
Final Thoughts
Today Aubzhang only covered what WorkBuddy looks like and the basic grammar of talking to it.
Once the coding barrier is flattened, the only thing limiting you is your imagination.
We only wrote a bit of copy today. A warm-up. So what else can this thing actually do?
Starting tomorrow, Aubzhang will take you through several days of building one real thing per day, each in a different scenario. Could be a complex research report. Could be a slick PPT. Could be a web page. Could even be something more fun.
One a day. Get your computer ready, register an account (grab the free model credits first, and don't let them reset at month end), and we'll see real results tomorrow.